Sunday 25 June 2017

Quetzalcoatl Rampant


A couple of months ago I finished rebasing and touching up my 1/72 scale Aztecs and Conquistadors but hasn't actually played a game with them.  If come across the Lion Rampant variant "Quetzalcoatl Rampant" which can be found on the excellent I Live With Cats blog (Link) and decided these looked perfect for a test game.

I hadn't played Lion Rampant for ages but luckily Eric the Shed had arranged a Crusades themed game the week before and my son and I took part, fielding the Crusader forces.  There's a report here on Eric's blog.  Let's just say it didn't go well with the Crusaders failing practically every morale roll we made (and admittedly a flawed plan which the Saracens exploited fully).  At least it meant that for the Aztec game I was fully up to date and familiar with the rules.  Quetzalcoatl Rampant has a few variations.  The Conquistadors have half strength units to reflect their low numbers but are significantly more powerful with better strength and defence and of course they have the benefit of  horses and black powder weapons which can have a devastating effect on the Aztecs.  The natives considerably outnumber the Spanish and have the option to capture rather than kill which also saps morale (presumably as the captives still-beating hearts are plucked out etc) although no one did this in our game.

We allocated sides randomly and my opponent, Anthony, took the Aztecs.  We played a scenario where the Aztecs had to defend a sacred pyramid in the centre of the table with part of their force and hope remainder of their warriors arrived in time to repel the plundering Spanish.  This was a  large Lion Rampant game with 35 points per side.  I find the activation rules for Lion rampant a bit disjointed...normally if a unit fails it's command roll then the whole side stops.  At the games at Eric the Sheds the house rule is that even if an individual unit fails we continue for each one in a side.  As a compromise I stuck with the normal LR rule but each of us had 2 commands...the Aztecs had the defenders and the relief force and the Spanish had the Conquistadors and some Tlaxcalan allies.

Initially things looked pretty difficult for the Aztecs.  The Spanish steamed forward although their allies proved a lot less enthusiastic.  The pyramid was defended by the elite Aztec Eagle and Jaguar knights but the relief force was also reluctant to hurry to their rescue.

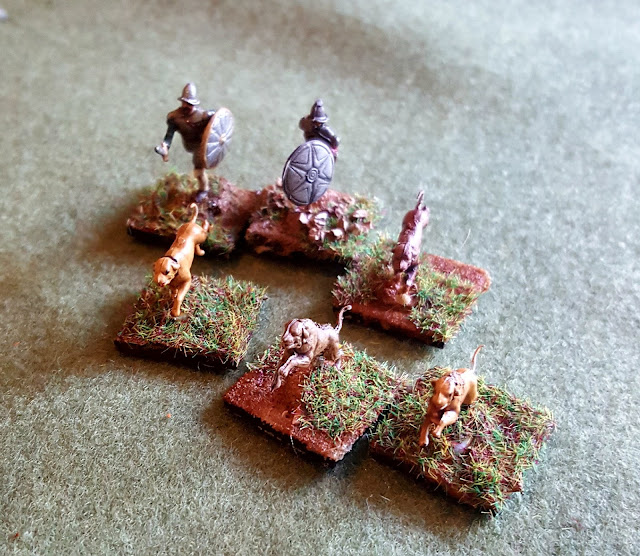
The Spanish chased off some Aztec skirmishers with a  pack of War Dogs but these in turn took heavy casualties as the key did so and being only 6 strong instead of the usual 12 this meant they couldn't take much punishment.

The Tlaxcalans fielded a unit of archers who proved pretty effective in weakening the Eagle Knights before being driven off the table as the Knights charged forward uncontrollably.  They eventually came to grief themselves when the Spanish cavalry hit them.  By this point the Aztecs relief force was beginning to but crucially most of Anthony's skirmish troops had lagged behind.  Missile troops always seem powerful in LR and these may have made an impact if they'd got there in time.  As it was the Spanish horse and Swordsmen  were able to punch through the centre and seize the Pyramid, winning the game.  What I hadn't realised (but Anthony had) was that I was only a unit away from my army morale breaking so the result was a very close run thing indeed.

The rule variants worked really well and although I'd initially been worried that the Spanish were overpowered the game was well balanced in the end.  Many thanks to the I Live with Cats blog for a great adaptation.

The Spanish arrive


Aztec skirmishers

Woof!!..the Spanish War Dogs


Aztec Knights defend the temple

Aztec reinforcements arrive slowly


Sunday 18 June 2017

NWF: a generous gift

As regular readers will know I am lucky enough to be part of a regular group that take part in games hosted by Eric the Shed (Shed Wars blog).  During a conversation one evening recently with Eric I mentioned my 54mm North West Frontier project and how it was coming along.  He told me that his late father had some painted some figures and formed these into dioramas and very kindly offered them to me.  He warned me that the painting quality might not be great but they may be usable with some touching up.

A week or so later I picked up a 4 dioramas of infantry and cavalry and a very impressive mounted artillery piece.  All the infantry and cavalry are actually from the same Armies In Plastic range that I've been using for my armies so they'll fit in perfectly.  The cavalry are the British 19th Hussars set and  a unit of Indian Cavalry along with 27 regular infantry.  Although I couldn't see a limbered artillery set on the AiP website I'm pretty sure all the figures and gun pieces are from one of their sets.


 To be honest the painting was pretty good...I've certainly produced much worse... and I don't think the figures will need much more that washing and highlighting in most cases.  Because these are soft plastic there are some parts where the paint has flaked off: this is especially noticeable on the Indians (in the photo you can see the yellow plastic showing through on the sword).

So far I have removed the cavalry and the artillery from their diorama bases.  This was a harder job than it sounds as Eric's father had used what I'm guessing is Milliput or something similar to mount the figures and it was really tough to break off.  I tried soaking the cavalry overnight which helped a bit but actually it was easier when the surface was dry and brittle.  With a bit of twisting and chiselling with a screwdriver (and a few near misses with my fingers) the figures are now free.  I've still to attempt to remove the infantry yet though...they're a pretty substantial block of basing which might take a while.

Once these are free I'll start work on touching up the figures and rebasing and hope I can do credit to Eric Seniors modelling skills.  A very generous gift indeed!  Of course now I have lots of British so my Pathans are a bit outnumbered and I'll have to buy some more!!!

Saturday 3 June 2017

Sharp Practice 2 - 1st game

Napoleonics isn't really my period...don't get me wrong, I'll happily play a game at a club night and have played several excellent Black Powder games at Eric the Shed's place but I find the period a bit intimidating if I'm honest.  Too many uniforms, too many obscure battles and constantly changing alliances between obscure states.  I tend to lose track and it seems to be a period that some people with an interest have a lot of knowledge about, and get very intense about...just take a look at the Napoleonics section of TMP!

Incidentally what is going on over there???  There seems to be a complete meltdown by the editor and an increasing number of rabid right wing posts... After the last debacle with bizarre posts by the Editor about British gamers I've decided to take a break (maybe permanently) from the site and look to other more sensible forums like LAF and TWW for my wargaming info.

Anyway, back to Napoleonics. 

Since my knowledge of the period is a bit lacking I find myself drawn to a more Hollywood/fictional version and the Sharp Practice rules by Too Fat Lardies are ideal for this cinematic style of game.  I'd bought the 2nd edition of these last year but not actually managed to play a game with them so I was glad to test them out earlier this week in a game with a friend.

I've played a few games with the earlier edition (although not for some time) so I was interested to see the changes that they'd made.  The bulk of the rules were very familiar...especially around movement, firing and hand to hand (or Fisticuffs).  The card activation system is also similar but they have clearly been influenced by the development of Chain of Command.  Units deploy from a deployment point and in some cases can have a mobile deployment point, similar to CoC Jump Off points. 

Leaders are activated when their card is drawn and each leader then has a number of orders they can issue. This is one of the areas that can be a bit confusing...a leader's order can be to activate a unit which then in turn has 2 activations of it's own (eg move, reload or fire etc).  Leader's orders are much more varied and they can also add to a units firing, rally off shock points etc.  So a leader could, for example, do 3 things...activate a unit, move and do a task...and the unit could then also do 2 things as part of it's activation.  It takes a little getting used to but works really well in practice.

There are also Command Cards which are players can use to do additional things... a bit like Chain of Command points in CoC.   These can be used to add to firing or fisticuffs, or to allow units to do special activities or activate out of sequence.  Remembering what these can do is pretty important and annoying when you complete your move and then realise that you could have used them.

Sharp Practice works best with a scenario based game and in ours my dastardly French had managed to capture a British soldier and the Regimental Colours and were marching him off into captivity.  A British rescue mission commanded by Andrew had been despatched to bring him back and avoid the disgrace of losing the flag (the scenario would have been rescuing a damsel in distress but I couldn't lay my hands on my civilian figures so a flag bearer had to be pressed into to service instead!)

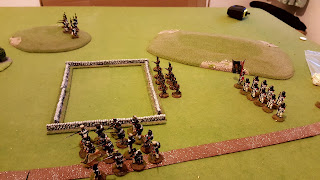
The French forces set off down the road with a column leading the way and the prisoner escorted by the Guard at the rear


Opposing them were a force of Highlanders, supported by a Navy landing party and the Rifles.  The Highlanders took up a position on a hill overlooking the road and waited for the column to arrive


Eventually they realised I wasn't going to march straight into their guns and they had to reluctantly come off the hill and try to intercept my Guards


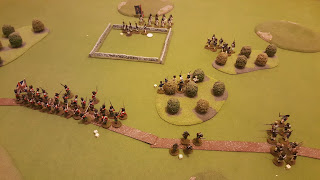
The Rifles bravely blocked the road and caused the French column to halt, inflicting several shock points.  They suffered badly though when a returning volley from the leading unit in the French column caused casualties and they quickly took cover in a nearby wood

French Skirmishers had worked round on my right an began taking shots at the Navy who quickly joined the Rifles in the wood


The wood had become a difficult spot to get past as it was full of Riflemen and sailors (armed with 'Big Choppers' according to the rules...)


Andrew's Highlanders had advanced to cut off the Guard and the prisoner who were on the other side of a walled field and screened by the French Voltigeurs.  The potential firepower from the British formation was pretty daunting and would have caused a lot of damage but the French column had now broken up and began to fire into the flank of the British line, causing a huge amount of Shock points to one British unit.

The Rifles had suffered an unexpected penalty when they entered the wood: when 3 Command cards are drawn in a row, a Random Event occurs and unfortunately for a crack Rifle unit it was damp powder (presumably from all the soggy undergrowth), reducing their firepower.  To be fair I also suffered an unfortunate event when my Sergeant stepped in something unpleasant, reducing his command ability until he could wash it off!.

Andrew decided to throw caution to the wind and, having spotted that one of my Line Infantry units was unloaded after firing, the Rifles charged out of the wood and engaged them in Fisticuffs.  The Rifles were clearly led by a rather heroic leader (I wonder who!) as they completely routed the French unit after a couple of rounds of combat!

At the end of the evening the game looked like this.  The Guard are at the top of the picture, having made it 2/3 of the way up the table but are still faced by 2 out of 3 Highland units.  The Navy are a bit beaten up and skulking in the wood but still pose a threat.  The Rifles, at the bottom centre, are about to get blasted by the remaining French unit to their left.  So the game finished quite tightly balanced and still with all to play for.  With hindsight Andrew should probably have come off the hill sooner and taken a more aggressive approach as it allowed me to manoeuvre away from the rather scary Scots for most of the game.


I thought the rules were excellent and have a great feel for this kind of game...there are lots of mechanics for scenario-based tasks (eg burning down buildings, looting, wooing damsels) etc which fit well with the Sharpe-style of game, but which we didn't get into in this game.  I know Andrew wasn't very impressed with them but I find Too Fat Lardies rules are pretty Marmite and people either take to them or not.  For me these are definitely rules to use again and would be ideal for my NWF project.